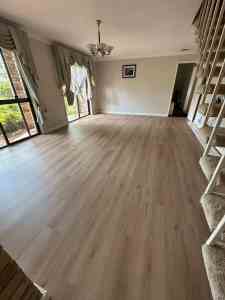
Location: Castle Hill, Sydney NSW
Flooring Product: Preference Floors Aspire Hybrid – Chicory
Scope of Work: Tile Removal, Subfloor Repairs, Floor Levelling, Hybrid Flooring Installation, Kitchen Finishing and New Skirting Boards
Giving an Older Castle Hill Home a Fresh New Look
At Floorplan Studio, we believe a successful flooring renovation is about much more than choosing beautiful floorboards. What happens underneath the flooring is just as important as the finished appearance.
This recent project in Castle Hill was a perfect example.
Our client, Jim, happens to be our neighbour. He and his family wanted to replace the outdated ceramic tiles throughout their home with something more modern, comfortable and visually appealing.
They selected Preference Floors Aspire Hybrid Flooring in Chicory, a beautiful timber-look design that would give their home a warmer and more contemporary appearance.
However, once we assessed the existing floor structure, we knew this would be much more than a straightforward flooring installation.
The project involved several significant challenges:
-
An extremely uneven timber subfloor, with height differences reaching 40 mm over just 2 metres.
-
Existing timber flooring panels with numerous joints and gaps, making floor levelling particularly challenging.
-
A kitchen installed directly over thick ceramic tiles, requiring careful removal and new finishing details.
-
Potential asbestos-containing materials associated with an older Sydney home.
-
A family with three children who needed to continue living in the property throughout the renovation.
Our challenge was to address these technical issues while keeping disruption to the family as manageable as possible.

Step 1: Asbestos Testing Before Tile Removal
When renovating older homes in Sydney, asbestos is an important consideration, particularly in properties built or renovated before the 1990s.
Asbestos-containing materials may be present in certain older flooring products, adhesives, underlays and other building components.
Before commencing demolition, we arranged for the suspected materials to be tested.
We waited approximately one week for the laboratory results, which fortunately came back negative for asbestos in the samples tested.
With this important safety concern addressed, we were ready to begin.
For homeowners considering flooring installation near me, particularly in established suburbs such as Castle Hill, Hornsby and Epping, proper assessment of existing flooring materials should always be part of the renovation planning process.
Step 2: Protecting the Home Before Demolition
One of the biggest considerations for this project was that Jim and his three children would continue living in the house during the renovation.
Removing ceramic tiles can generate significant dust, noise and disruption, so careful preparation was essential.
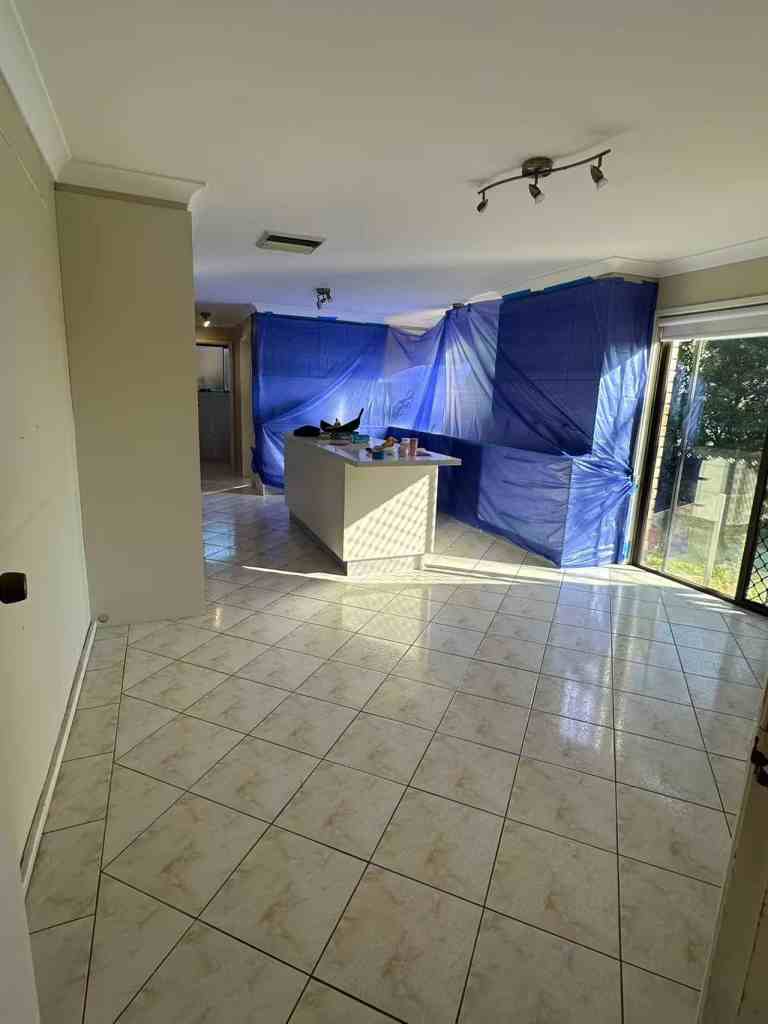
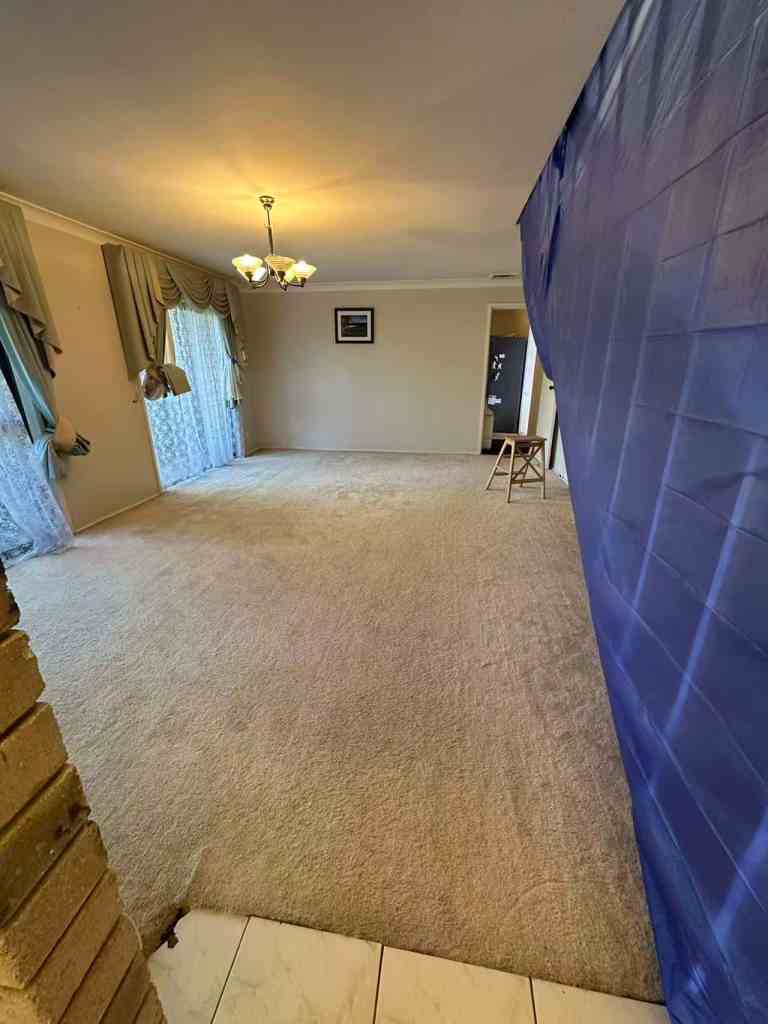
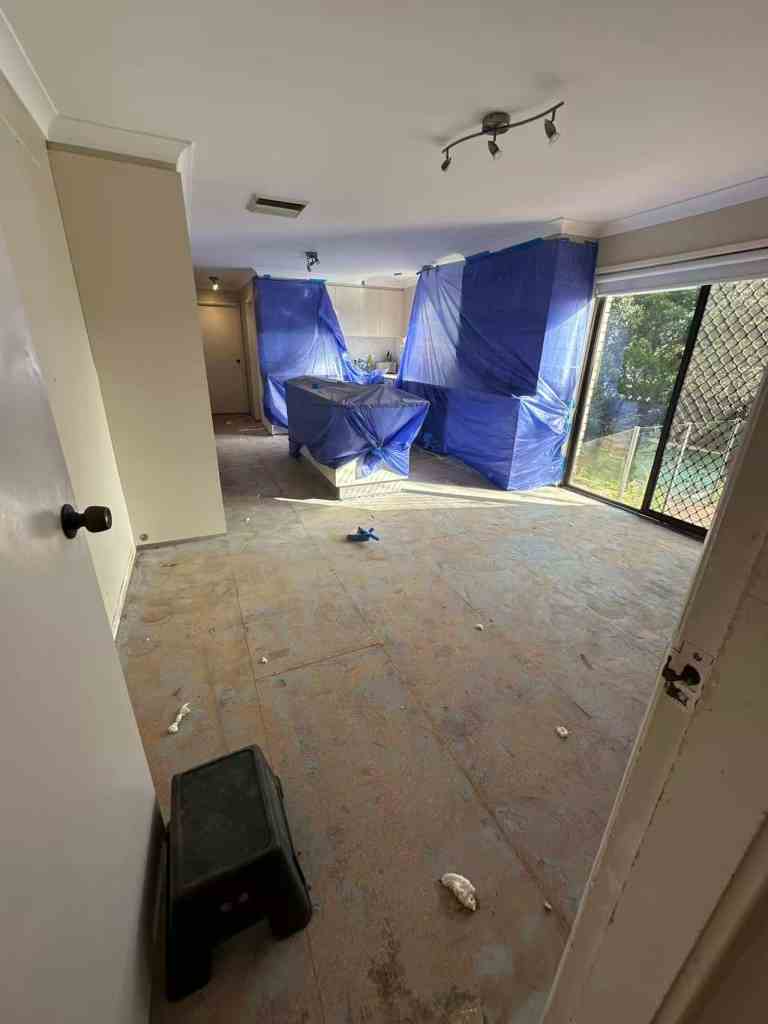
Before starting demolition, our team thoroughly sealed off the kitchen and the access route to the upstairs living areas using protective plastic sheeting.
This helped contain dust within the work area and allowed the family to continue using other parts of the house.
We also planned the work sequence carefully to minimise unnecessary interruptions.
For occupied homes, good flooring installation is not just about completing the work efficiently. It is also about respecting the people living there.

Step 3: Tile Removal Revealed Unexpected Subfloor Damage
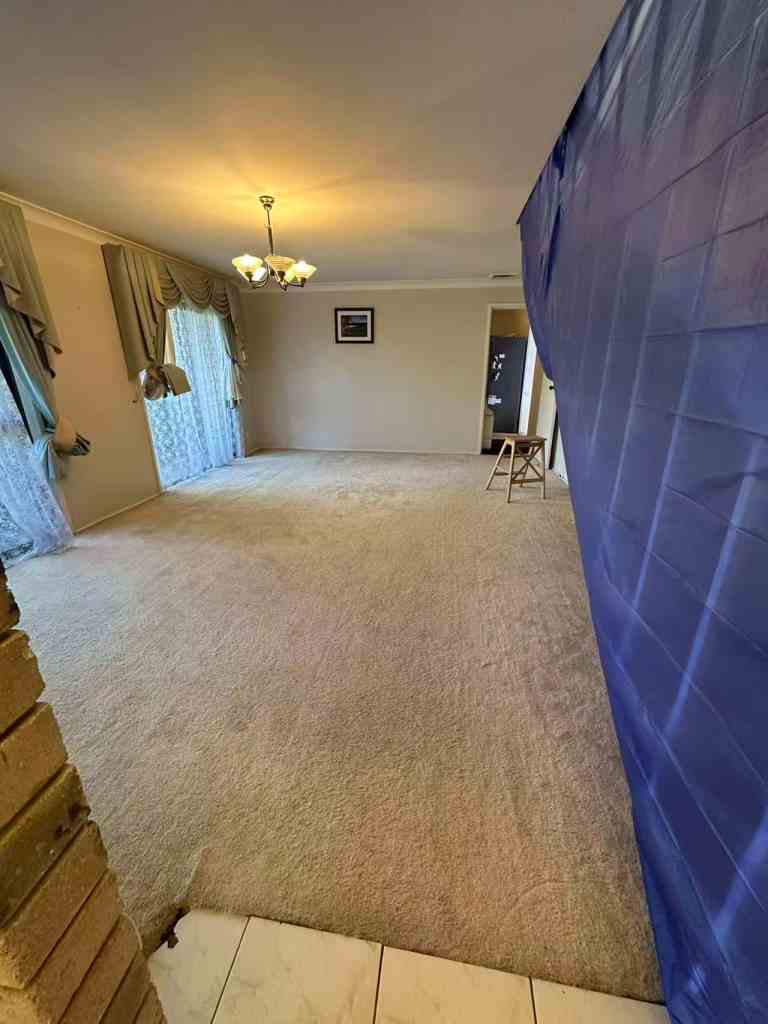
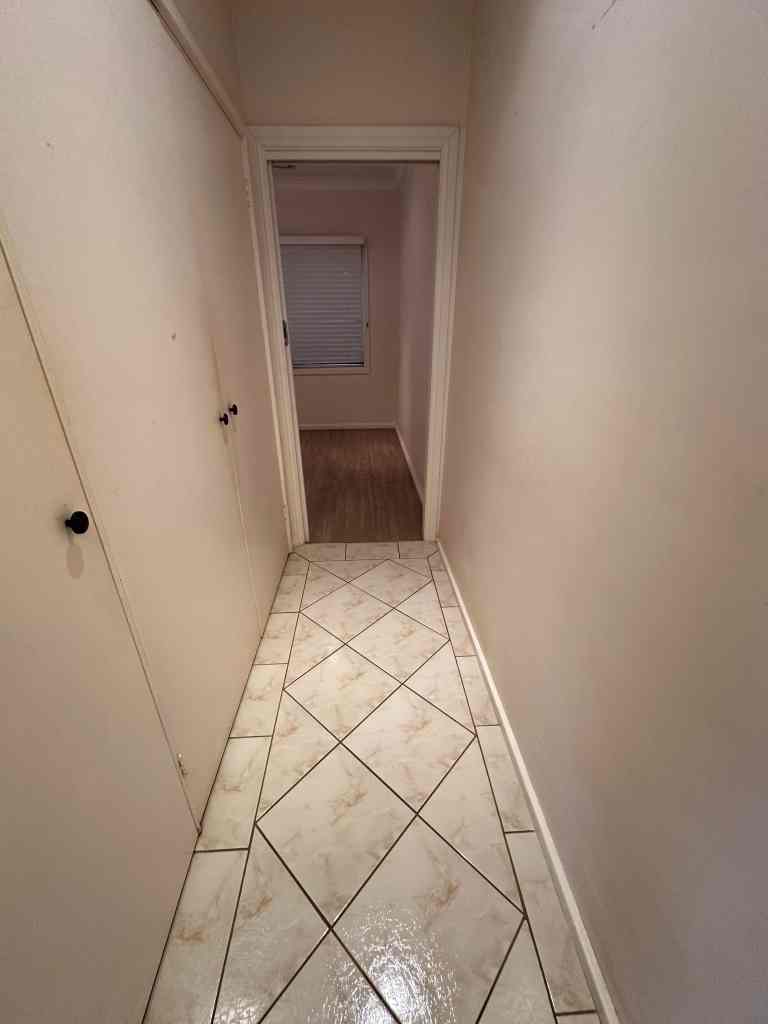
Once the protective measures were in place, we began removing the existing ceramic tiles.
As is often the case with renovations, removing the old flooring revealed problems that had been hidden for years.
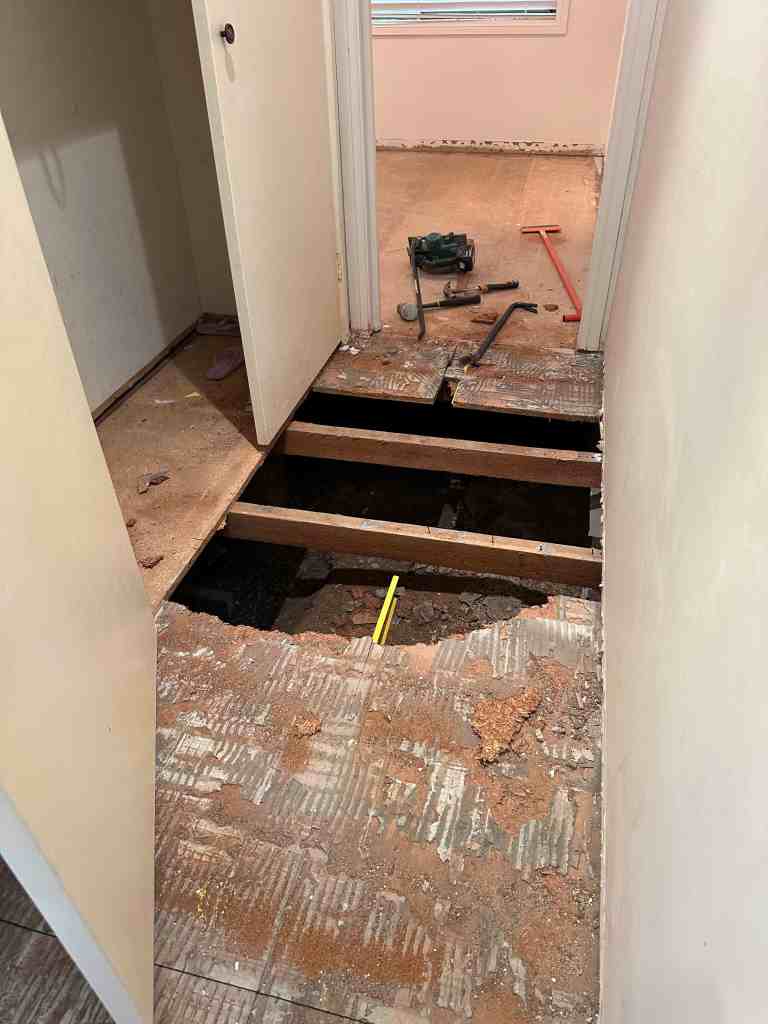
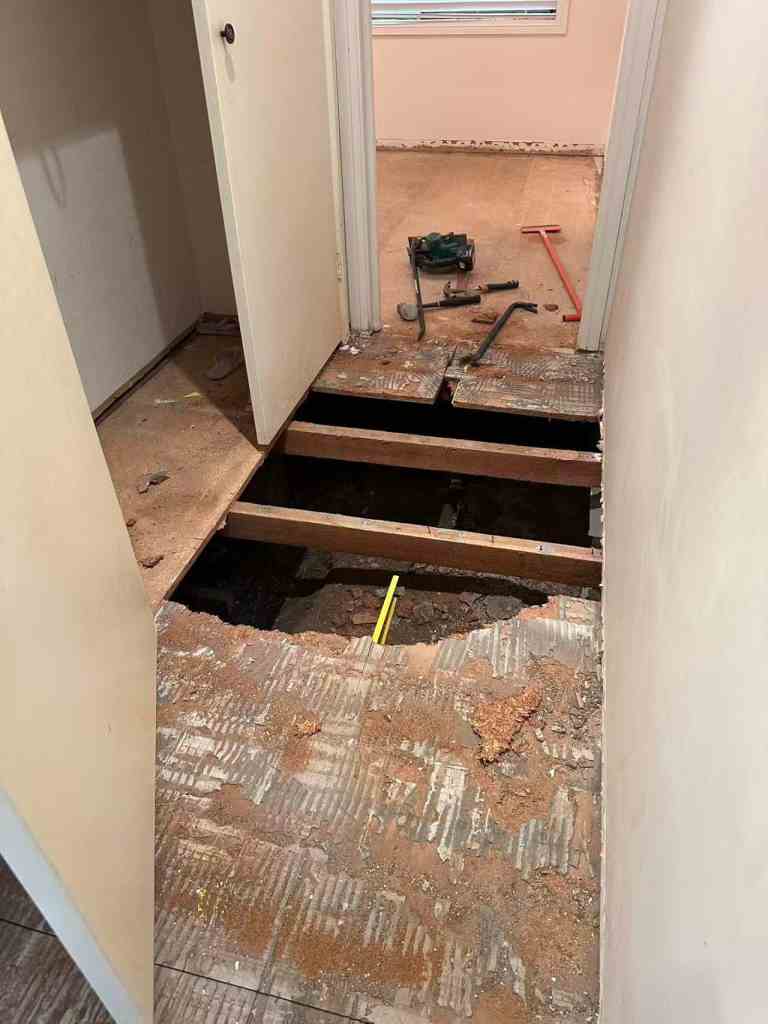
Around the entrance and hallway, we discovered several areas of severely water-damaged Yellow Tongue particleboard flooring.
The boards had deteriorated so badly that some sections could almost be broken through underfoot.
Installing new flooring directly over these damaged panels would have been completely unacceptable.
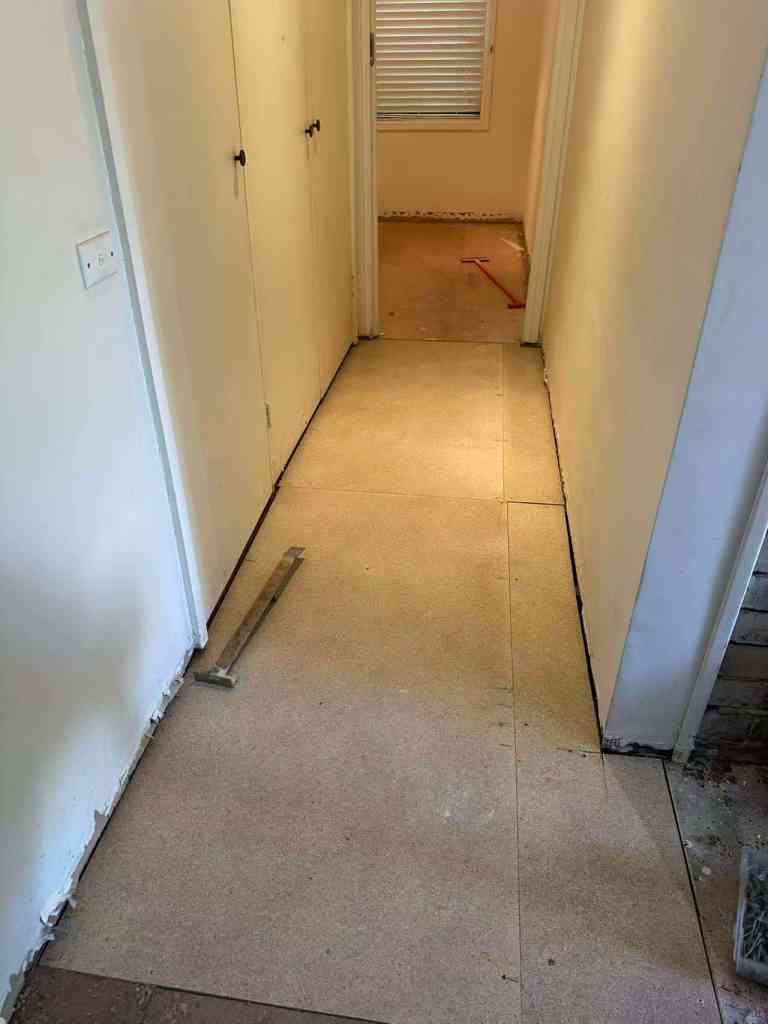
Instead, we removed the affected sections and replaced them with new Yellow Tongue structural flooring panels.
This provided a sound and stable base for the subsequent floor preparation work.
This is why we always emphasise the importance of proper subfloor preparation.
Beautiful new floorboards cannot compensate for an unstable or deteriorating subfloor.
Whether you are installing hybrid flooring, timber flooring or other flooring products, identifying and repairing structural problems before installation is essential for long-term performance.
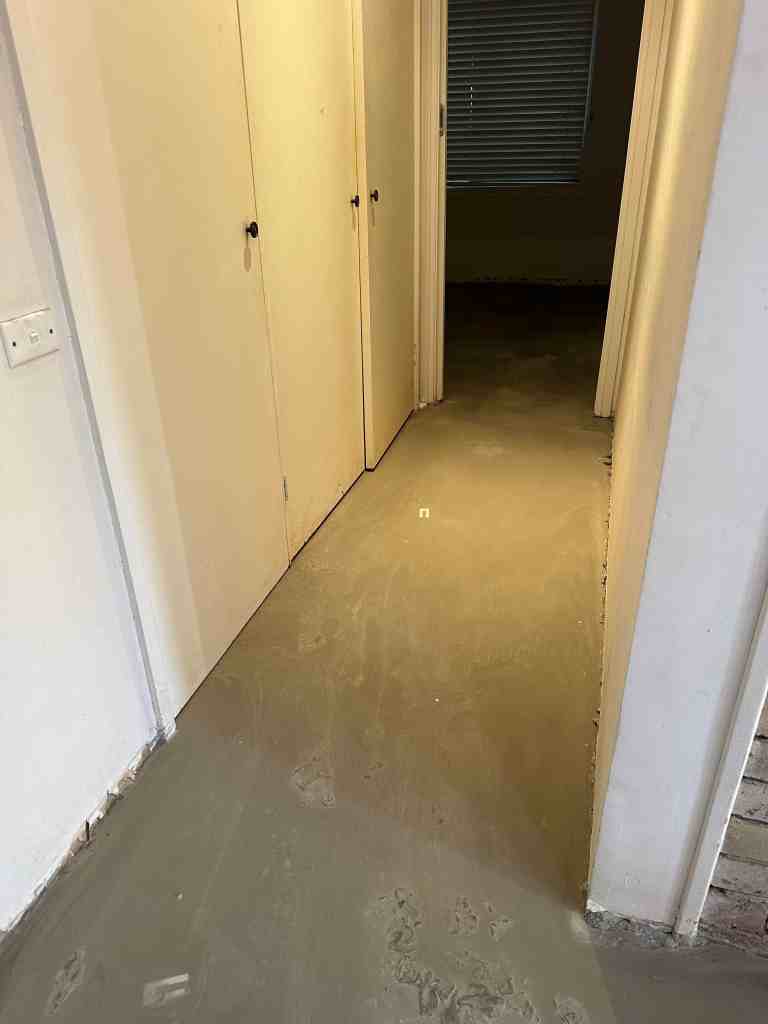
Step 4: The Biggest Challenge – Levelling an Extremely Uneven Timber Subfloor
After removing the tiles and repairing the damaged sections, we could finally assess the full extent of the subfloor irregularities.
And the results were quite remarkable.
In some areas, the floor height varied by as much as 40 mm over a distance of just 2 metres.
For comparison, many modern floating flooring systems require subfloor flatness within approximately 3 mm over 2 metres, subject to the manufacturer’s installation requirements.
A 40 mm variation is therefore far beyond acceptable installation tolerances.
Simply laying hybrid flooring over such an uneven surface would risk excessive movement, joint stress, unwanted noise and premature flooring failure.
Why Is Levelling a Timber Subfloor So Challenging?
Unlike concrete, timber subfloors consist of individual structural panels with joints, gaps and potential movement.
Applying self-levelling compound over these surfaces requires considerably more preparation and technical understanding.
The levelling system must be compatible with the timber substrate, and joints, gaps and other potential leakage points must be properly addressed before pouring.
Otherwise, the levelling compound may escape through openings or develop problems associated with an unsuitable substrate.
There were also practical height restrictions to consider.
We needed to achieve a flat finished surface while carefully managing floor levels around sliding doors, entrances and the existing kitchen.
Raising the entire floor unnecessarily could create additional problems at these locations.
Carefully Planning the Levelling Heights
Our experienced installers worked methodically across the floor, checking levels with long straightedges and calculating the required levelling heights.
They measured the floor section by section, marking reference points with packers to establish the intended finished levels.
This process allowed us to determine where additional levelling material was required and where existing height restrictions needed to be accommodated.
It was a time-consuming exercise, but an essential part of achieving the best possible result.
For projects involving substantial subfloor irregularities, the planning and preparation often require more technical expertise than laying the floorboards themselves.


Step 5: Using Mapei Self-Levelling Compound
For this project, we selected a premium self-levelling system from Mapei.
Mapei is a well-established manufacturer of professional flooring preparation products, including primers, adhesives and self-levelling compounds.
We regularly work with Mapei products because reliable subfloor preparation is fundamental to the quality of our installations.
Preparing and levelling an uneven timber subfloor requires careful product selection, appropriate priming and correct installation procedures.
Premium levelling compounds may cost more than basic alternatives, but choosing a suitable system is an investment in the performance of the finished floor.
The Result: From an Uneven Surface to a Beautifully Flat Subfloor
The transformation after levelling was remarkable.
What had previously been an uneven, wave-like surface was now exceptionally flat.
When we placed a 3-metre straightedge across the finished subfloor, there were virtually no visible gaps beneath it.
Jim was delighted.
In fact, he was so pleased with the result that he was already celebrating before we had even started installing the new flooring!
And we could understand why.
For us, completing the difficult subfloor preparation was one of the most satisfying milestones of the entire project.
With the subfloor properly prepared, the remaining flooring installation became much more straightforward.


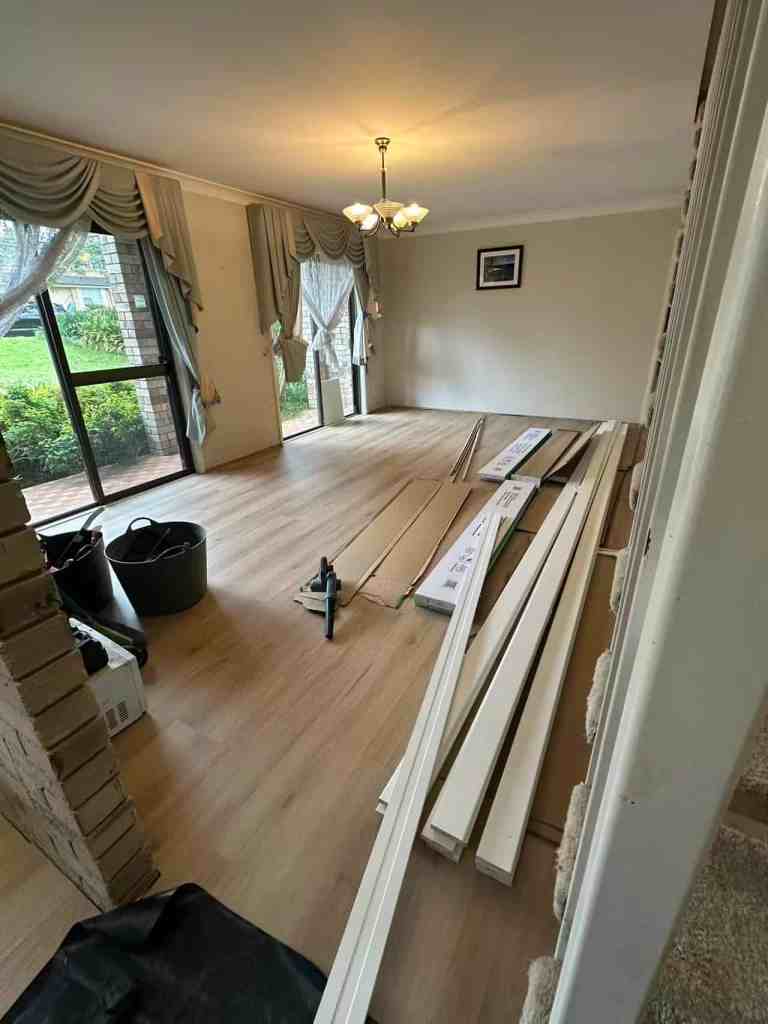
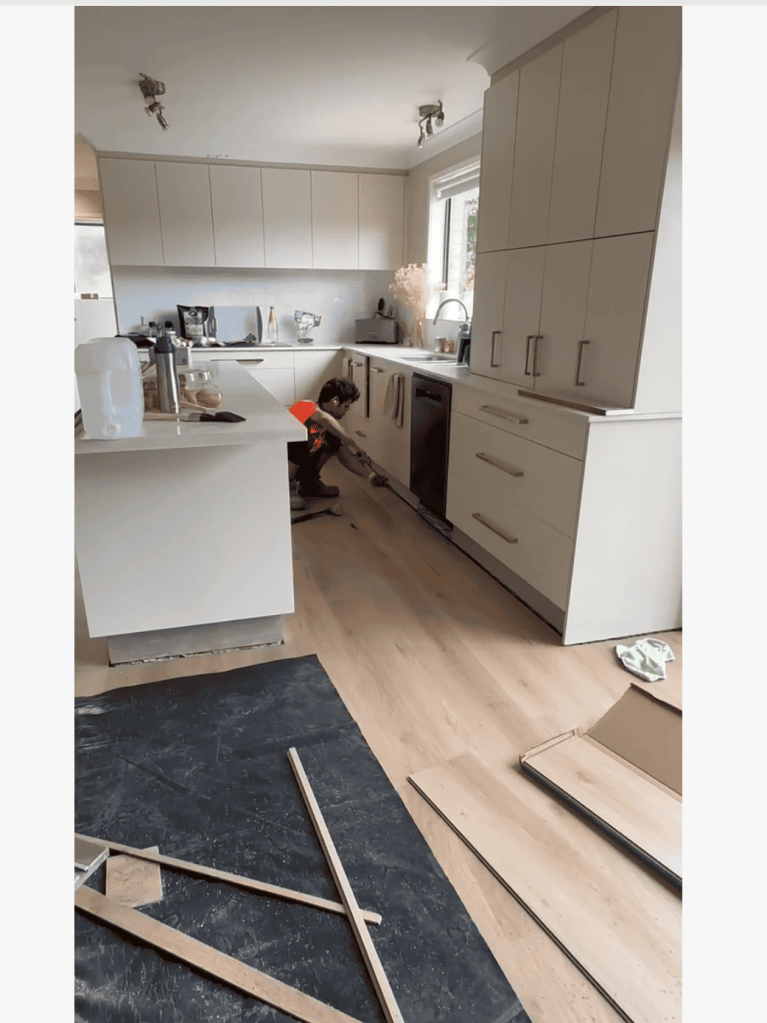
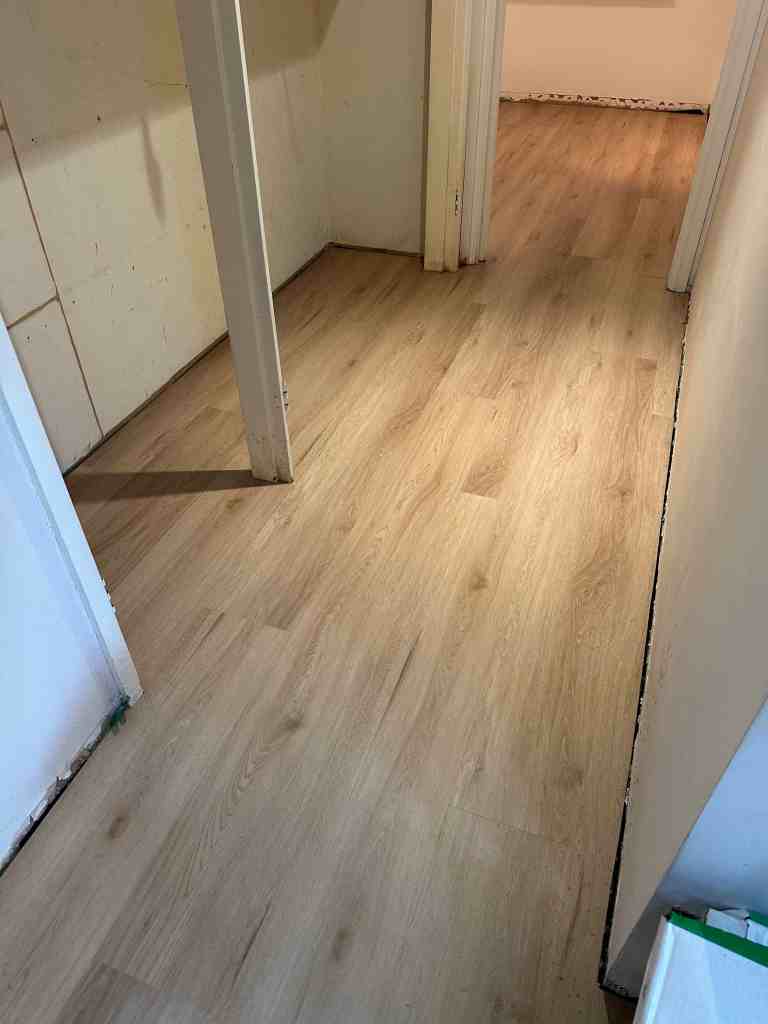
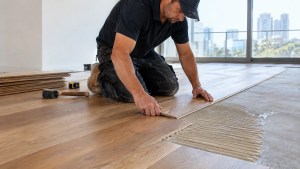
Step 6: Installing Preference Floors Aspire Hybrid Flooring – Chicory
With the structural repairs and floor levelling completed, we could finally begin the most visually rewarding stage of the project.
Jim selected Preference Floors Aspire Hybrid Flooring in Chicory.
The Chicory colour features a warm, natural timber appearance that complements the character of an established family home while introducing a fresh, contemporary look.
Hybrid flooring is a popular choice for Sydney homeowners because it combines the appearance of timber with the practical benefits of a modern floating flooring system.
Some of its key advantages include:
-
A natural timber-look finish.
-
Easy cleaning and everyday maintenance.
-
Good resistance to everyday wear.
-
Water-resistant or waterproof performance, depending on the product specifications.
-
A practical flooring solution for busy family households.
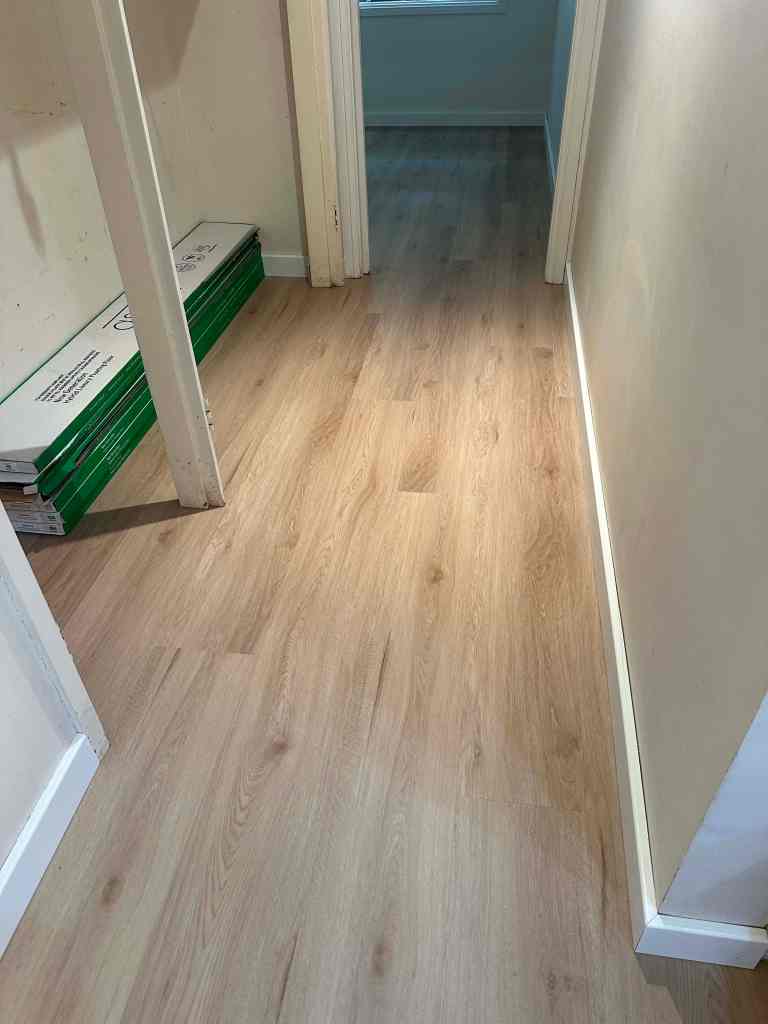
For Jim’s home, the new flooring immediately transformed the appearance of the living areas.
The outdated tiles were replaced with a consistent timber-look surface, creating a warmer and more welcoming atmosphere.
However, the visual transformation was only part of the achievement.
The extensive preparation underneath meant that the new flooring was installed over a stable, properly prepared surface.
A beautiful floor is important, but a beautiful floor installed correctly is what makes the difference.
Step 7: Solving the Kitchen Cabinet Height Problem
Another interesting challenge involved the existing kitchen.
The kitchen cabinets had originally been installed on top of the thick ceramic tiles.
Once the surrounding tiles were removed, a substantial gap became visible beneath the kitchen cabinetry.
This is a common issue when replacing thick tiles with thinner flooring products while retaining the existing kitchen.
Without a suitable finishing solution, the exposed gap would have looked unfinished and detracted from the entire renovation.
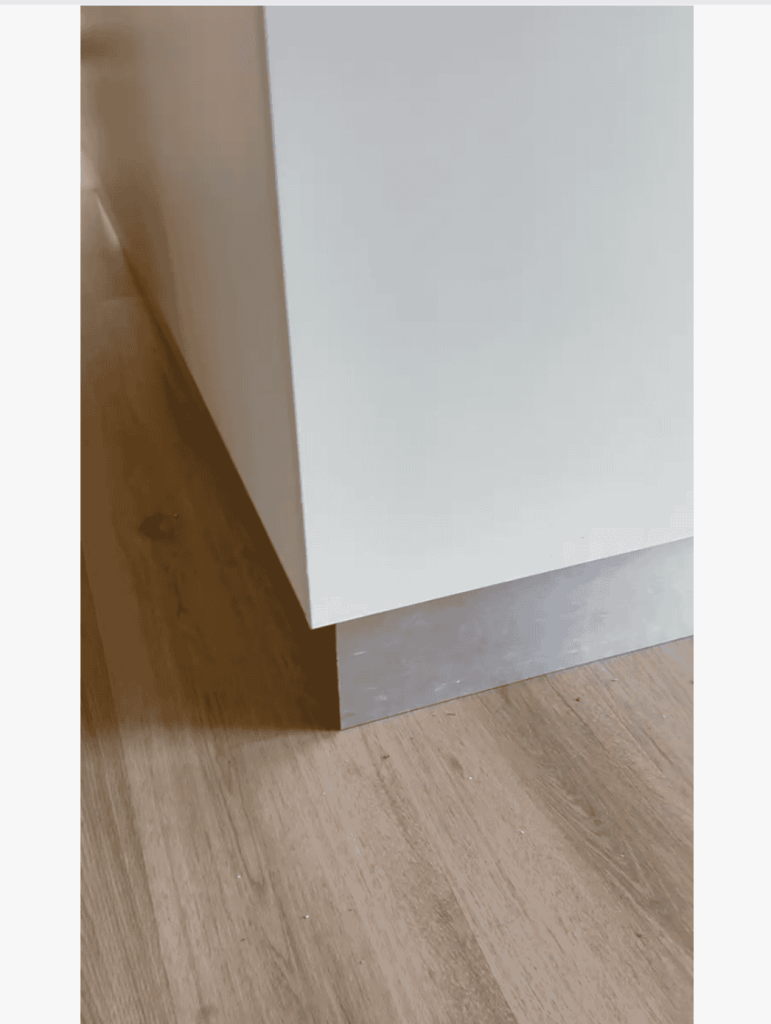
Our Solution: New Silver Kitchen Kickboards
Rather than modifying or replacing the kitchen cabinets, we designed a new finishing solution around the existing cabinetry.
We supplied and installed new silver-coloured kitchen kickboards to cover the exposed gaps and create a clean transition between the kitchen and the new hybrid flooring.
The silver finish complemented the existing kitchen design and provided a neat, modern appearance.
The result was a seamless visual connection between the new flooring and the existing cabinetry.
This small detail made a significant difference to the overall presentation of the finished renovation.
It also allowed Jim to retain his existing kitchen without the additional cost and disruption of major cabinetry alterations.


Step 8: Installing New 90 mm Skirting Boards
To complete the renovation, we installed new 90 mm skirting boards around the flooring perimeter.
New skirting boards provide a clean finish and cover the expansion gaps required around floating flooring installations.
They also help create a consistent appearance between the flooring and the walls.
Once the new skirting boards and finishing trims were installed, the entire space looked significantly more refined.
Interestingly, Jim also noticed that the old musty smell previously present in the house had disappeared after the renovation.
The removal of the deteriorated flooring materials, repairs to the damaged subfloor and completion of the new flooring system had made the interior feel noticeably fresher and cleaner.
While flooring replacement alone cannot resolve every underlying moisture issue, identifying and removing damaged materials can be an important part of improving the condition of an older home.



Step 9: Completing the Renovation Around Family Life
One of the most rewarding aspects of this project was completing the work while Jim and his three children continued living in the house.
From the beginning, we understood that the renovation needed to fit around their daily routines.
Our team carefully planned the sequence of demolition, subfloor repairs, levelling and installation to reduce unnecessary disruption.
Protective barriers helped separate the work areas from the occupied parts of the home, while coordinated scheduling kept the project moving efficiently.
Most importantly, we managed to complete the renovation in time for the family’s weekend party.
Jim was particularly pleased to have his newly renovated floors ready to show his guests.
After seeing the finished result, we jokingly asked him:
“So Jim, do you think the house is worth another $100,000 now?”
Of course, we cannot put an exact figure on the value added by a flooring renovation.
But the improvement in appearance, comfort and overall presentation was undeniable.
And judging by Jim’s reaction, he was certainly happy with the investment.
What This Castle Hill Flooring Project Demonstrates
This renovation highlights why professional flooring installation involves much more than simply laying floorboards.
The most important work often happens before the new flooring is even visible.
In this project, we successfully addressed:
1. Significant subfloor unevenness
A timber subfloor with height differences of up to 40 mm over 2 metres required careful planning and extensive levelling.
2. Hidden water damage
Severely deteriorated Yellow Tongue flooring panels were identified, removed and replaced before installation.
3. Challenging floor preparation
A suitable Mapei levelling system was used to prepare the timber substrate for the new flooring.
4. Existing kitchen height differences
Custom finishing details allowed the existing kitchen to remain in place despite the removal of thick ceramic tiles.
5. Renovation in an occupied family home
Careful scheduling and dust protection helped minimise disruption while the family continued living in the property.
6. A complete visual transformation
Preference Floors Aspire Hybrid Flooring in Chicory, combined with new kitchen kickboards and 90 mm skirting boards, gave the home a fresh, modern appearance.
The finished result was not simply a flooring upgrade. It was a comprehensive renovation that addressed hidden problems while significantly improving the home’s interior.
Professional Flooring Installation in Castle Hill, Hornsby and Epping
At Floorplan Studio, we specialise in flooring supply, subfloor preparation and professional installation for residential and commercial properties across Sydney.
We regularly work with homeowners in Castle Hill, Hornsby, Epping and surrounding suburbs.
Our services include:
-
Hybrid flooring supply and installation.
-
Laminate flooring installation.
-
Engineered timber flooring supply and installation.
-
Existing flooring and tile removal.
-
Timber subfloor repairs and floor levelling.
-
Skirting boards, scotia and finishing trims.
-
Residential and commercial carpet supply and installation.
Whether you are searching for flooring installation near me or carpet installation near me, our team can assist with everything from product selection to subfloor assessment and professional installation.
We understand that every home is different, particularly older Sydney properties where uneven floors, previous renovations and hidden structural issues can make flooring replacement more complicated than expected.
Our approach is to identify these challenges early, explain the available solutions and complete the work with careful attention to both technical requirements and finishing details.
Planning a Flooring Renovation in Sydney?
If you are considering replacing old tiles, carpet or existing floorboards, we would be happy to help.
Visit our Floorplan Studio showroom in Thornleigh to explore our range of hybrid, laminate, engineered timber and carpet products.
You can also contact us to arrange a site inspection and discuss the most suitable flooring solution for your home.
Floorplan Studio – Quality Flooring Starts Beneath the Surface.