
Flooring Installation Explained
Installing new flooring is one of the most effective ways to transform the appearance, comfort and value of your home. Whether you choose laminate, hybrid, engineered timber or solid timber, a professionally installed floor can last for many years.
However, flooring installation involves much more than simply laying new floorboards over an existing surface.
At Floorplan Studio, with over 10 years of experience in residential and commercial flooring installation across Sydney, we believe that understanding the installation process is just as important as choosing the right product.
In this guide, we explain the four major stages of flooring installation, highlight some common misconceptions, and discuss why proper subfloor preparation is essential for a successful project.
If you are still exploring different flooring options, understanding how they are installed can also help you make a more informed decision.


Step 1: Removing Existing Flooring and Preparing the Site
Before installing new floorboards, we usually need to remove the existing floor coverings.
Depending on your property, this may involve removing:
-
Existing carpet and underlay
-
Laminate, hybrid or timber floorboards
-
Ceramic or porcelain tiles
-
Vinyl flooring and old adhesives
-
Existing skirting boards and scotia
-
Kitchen kickboards and other fittings where necessary
The removal process varies depending on the type of existing flooring and how it was originally installed.
For example, removing carpet is generally straightforward, while removing glued-down timber or ceramic tiles requires specialised equipment and additional labour.
Tile removal may also leave behind cement-based adhesives or uneven concrete surfaces that need further preparation.
One common concern we hear from customers is that removing tiles will be extremely expensive or complicated.
In our experience, this is not necessarily true.
With professional equipment and experienced installers, tile removal is often more manageable and affordable than homeowners expect. The actual cost depends on the tile adhesive, substrate condition, accessibility and the extent of the removal work.
More importantly, removing existing flooring allows us to inspect the actual subfloor condition, which is critical before proceeding to the next stage.
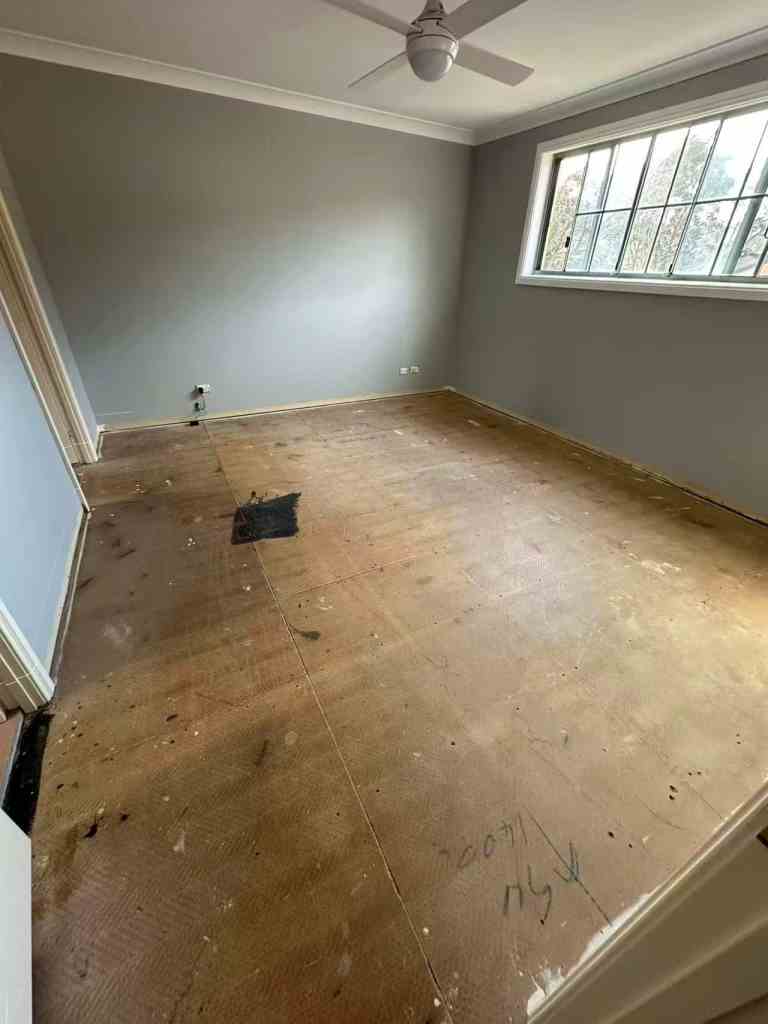


Step 2: Subfloor Preparation – The Most Important Stage of Flooring Installation
This is where many flooring projects succeed or fail.
Once the existing floor coverings have been removed, we can properly assess the subfloor.
There are two major factors we need to consider: subfloor flatness and moisture conditions.
Subfloor Levelling and Surface Preparation
A subfloor may look reasonably flat to the naked eye but still contain significant high spots, low spots and irregularities.
These imperfections can affect the performance of your new flooring.
Depending on the substrate and installation requirements, preparation may involve:
-
Concrete grinding to remove high spots
-
Applying self-levelling compounds to correct uneven surfaces
-
Installing suitable plywood underlayment over timber substrates
-
Repairing damaged or unstable subfloor sections
-
Removing adhesive residues and other surface contaminants
Different flooring products have different substrate tolerances, but many floating flooring systems require the subfloor to be flat within approximately 3 mm over 2 metres. Always refer to the specific manufacturer’s installation requirements.
It is also important to understand that flatness and levelness are not exactly the same thing. A floor does not necessarily need to be perfectly horizontal, but it must meet the flatness requirements of the flooring system.
Moisture Testing and Protection
Moisture is another critical factor, particularly when installing timber-based flooring or flooring over concrete slabs.
Excessive moisture can lead to swelling, deformation, adhesive failure and other long-term problems.
Depending on the moisture readings, flooring type and substrate, moisture management may involve:
-
Moisture testing before installation
-
Installing suitable moisture barrier films
-
Applying compatible moisture-control primers or moisture barrier systems
-
Allowing sufficient drying time for new concrete or levelling compounds
At Floorplan Studio, we select moisture protection systems according to the substrate condition and the flooring manufacturer’s specifications.
A moisture barrier film may be suitable for certain floating floor systems, while a compatible moisture-control coating may be required for some glue-down installations.
These solutions are not interchangeable, and the correct approach depends on the complete flooring system.
Why Does Floor Preparation Cost So Much?
This is probably one of the most common questions we receive.
For some renovation projects, particularly those involving extensive tile removal, substantial levelling or moisture treatment, removal and subfloor preparation can account for more than half of the overall project budget.
We understand why customers sometimes find this difficult to accept.
After all, you are spending a significant amount of money on something that will eventually be completely covered by your beautiful new floorboards.
But here is something we strongly believe:
Around 80% of a successful flooring installation comes down to proper preparation.
This is our practical assessment based on years of installation experience, rather than a formal industry statistic.
As part of our own research into customer experiences, we used AI to analyse more than 500 negative Google reviews of flooring businesses across Sydney. In our review of the results, over 300 complaints were identified as relating to subfloor preparation or issues potentially associated with inadequate preparation.
This was an internal analysis, not an independently verified industry study. Nevertheless, it reinforced something we regularly observe on installation sites: many flooring problems begin underneath the finished floor.
Problems such as movement, squeaking, uneven surfaces, damaged joints and premature wear can sometimes be traced back to inadequate preparation.
Understanding the importance of this stage, and allowing a realistic budget for it, can make an enormous difference to the outcome of your renovation.
Six Common Misconceptions About Subfloor Preparation
Over the years, we have heard many different opinions about floor preparation. Some are reasonable, while others can lead to costly mistakes.
Here are six important things we want our customers to understand.
1. All Flooring Types Require a Suitable Subfloor
Whether you are installing laminate, hybrid, engineered timber or solid timber, the substrate must meet the relevant installation requirements.
There is no such thing as a floorboard that can simply ignore an uneven subfloor.
Different products have different tolerances, but all require appropriate preparation.
2. Tile Removal Is Not Always as Expensive as You Think
Many homeowners try to avoid removing existing tiles because they assume the process will be prohibitively expensive.
In reality, professional tile removal is often a practical solution.
Installing new flooring over tiles may sometimes be possible, but it can introduce additional concerns involving floor height, adhesion, moisture, flatness and transitions.
We prefer to assess the actual site conditions rather than automatically recommending installation over existing tiles.
3. Timber Subfloors Can Sometimes Be Treated With Self-Levelling Compounds
A common misconception is that self-levelling compounds can only be applied over concrete.
In fact, suitable levelling systems can also be used over timber substrates, including certain plywood and Yellow Tongue particleboard floors.
However, this requires the correct preparation, primer, levelling compound and installation method.
Not every self-levelling product is suitable for timber substrates. The floor must also be structurally sound, sufficiently rigid and compatible with the chosen system.
4. Underlay Is Not a Substitute for Floor Levelling
Underlay serves important functions such as acoustic improvement, cushioning and moisture management, depending on the product.
However, standard flooring underlay is not designed to correct significant subfloor irregularities.
Using thicker or multiple layers of underlay to compensate for uneven surfaces may create excessive movement and compromise the flooring manufacturer’s warranty.
5. Cardboard and Random Packers Are Not Professional Levelling Solutions
We have occasionally encountered floors where cardboard, paper or other improvised materials were placed underneath floorboards to compensate for low spots.
This is not an acceptable substitute for proper subfloor preparation.
These materials may compress, deteriorate or shift over time, creating movement and instability.
Professional floor preparation should use suitable, durable and manufacturer-approved materials.
6. Gluing Down a Floating Floor to Stop Movement Is Not the Answer
This is one practice we strongly discourage.
If a floating floor is moving excessively because of an uneven subfloor, applying adhesive underneath individual sections is not a proper solution.
Floating flooring systems are designed to move as a complete assembly within their installation requirements.
Randomly bonding sections to the substrate can restrict this movement, create stress and potentially damage the flooring.
The correct solution is to identify and address the underlying cause rather than trying to hide the symptoms.

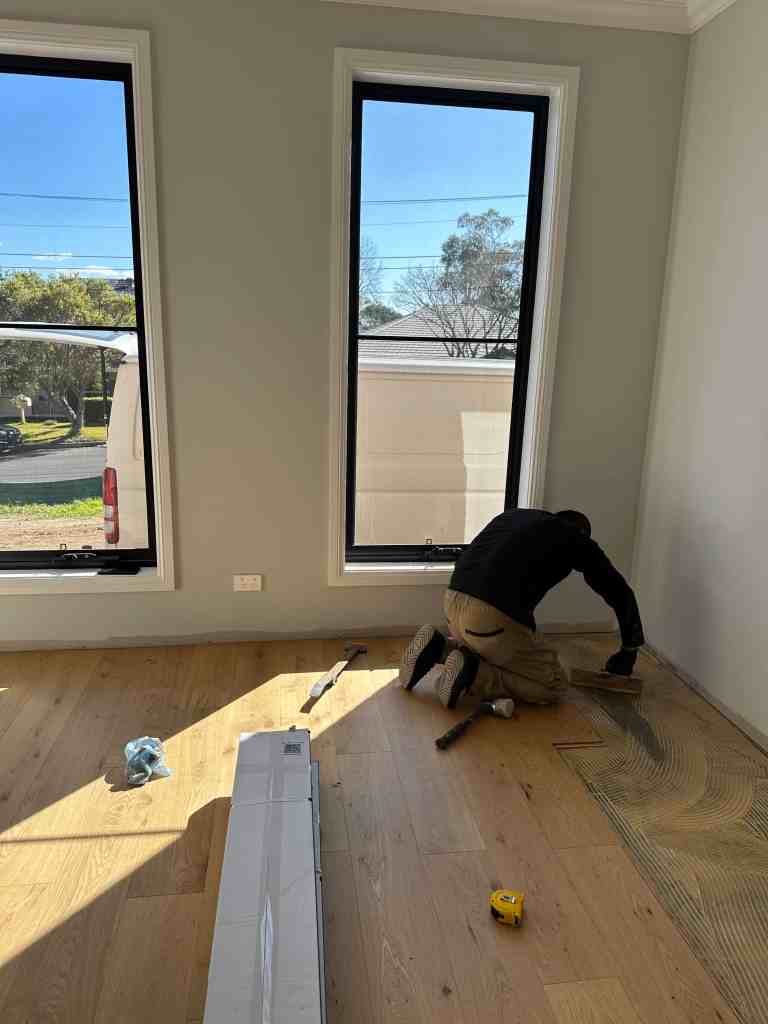

Step 4: Finishing, Expansion Gaps and Skirting Boards
The final stage of flooring installation involves completing the edges, transitions and finishing details.
Although this may appear to be a relatively small part of the project, it can make a significant difference to both the appearance and long-term performance of your flooring.
Why Expansion Gaps Matter
Most floating flooring systems, and many timber flooring installations, require expansion or movement allowances around walls and other fixed structures.
Floorboards naturally respond to changes in temperature and humidity.
Without sufficient space for movement, floors may develop problems such as buckling, lifting or pressure against surrounding structures.
The required expansion gap depends on the flooring product, room dimensions and manufacturer’s installation instructions.
A typical residential installation may require approximately 5–10 mm or more around the perimeter, depending on the product.
These gaps must remain functional after installation.
Why We Recommend New Skirting Boards
There are two common approaches to covering perimeter expansion gaps.
One is to retain the existing skirting boards and install scotia or beading along the edges.
The other is to remove the existing skirting boards and install new ones after the flooring has been completed.
At Floorplan Studio, we generally recommend installing new skirting boards wherever practical.
There are several reasons for this.
Firstly, skirting boards provide a cleaner, more integrated appearance, especially in modern homes.
Secondly, a properly selected and installed skirting board offers a durable way to conceal the required expansion gap.
Thirdly, replacing skirting boards allows us to achieve a more consistent finish around walls, door frames and adjoining areas.
Scotia can certainly be a practical and economical solution, particularly when existing skirting boards cannot be removed.
However, for homeowners seeking a premium finish, we believe new skirting boards are usually the better choice.
The important point is that skirting boards and other trims must conceal the movement gaps without restricting the flooring system’s intended movement.


Professional Flooring Installation Across Sydney
At Floorplan Studio, we provide flooring supply and installation services for residential and commercial projects across Sydney.
We regularly work with homeowners in Castle Hill, Hornsby, Epping and surrounding suburbs.
Our services cover the complete flooring installation process, including removal of existing flooring, subfloor assessment, moisture protection, levelling, installation and finishing.
We believe that a successful flooring project starts with honest advice and realistic expectations.
Rather than focusing only on the appearance of the finished floor, we take the time to consider what is happening underneath it.
Because beautiful flooring should not only look good on the day of installation. It should continue to perform well for years to come.
Planning a flooring renovation?
Contact Floorplan Studio to discuss your project, arrange a site inspection or visit our Thornleigh showroom to explore our flooring collections.
Our team will be happy to explain the installation process, discuss suitable products and provide a detailed quotation based on your requirements and site conditions.